To migrate a website to Drupal 8 or 9 from earlier Drupal versions or even from another CMS, such as WordPress, you might consider using Drupal migration services. In this article, we want to review the Migrate API and describe its powerful features.
What is Drupal Migrate API?
Migration means extracting data from a certain source and using it to automatically create different components of your site. The Migrate API is a flexible and robust system that provides services for migrating data from various sources to Drupal 8 (or later). It makes it easier to import data from different locations and store them in Drupal. In fact, this API is a full-blown extract, transform, and load (ETL) framework.
Every migration is an ETL process, where:
- Source is the extract phase
- Process is the transform phase
- Destination is the load phase.
The process can be depicted like that:
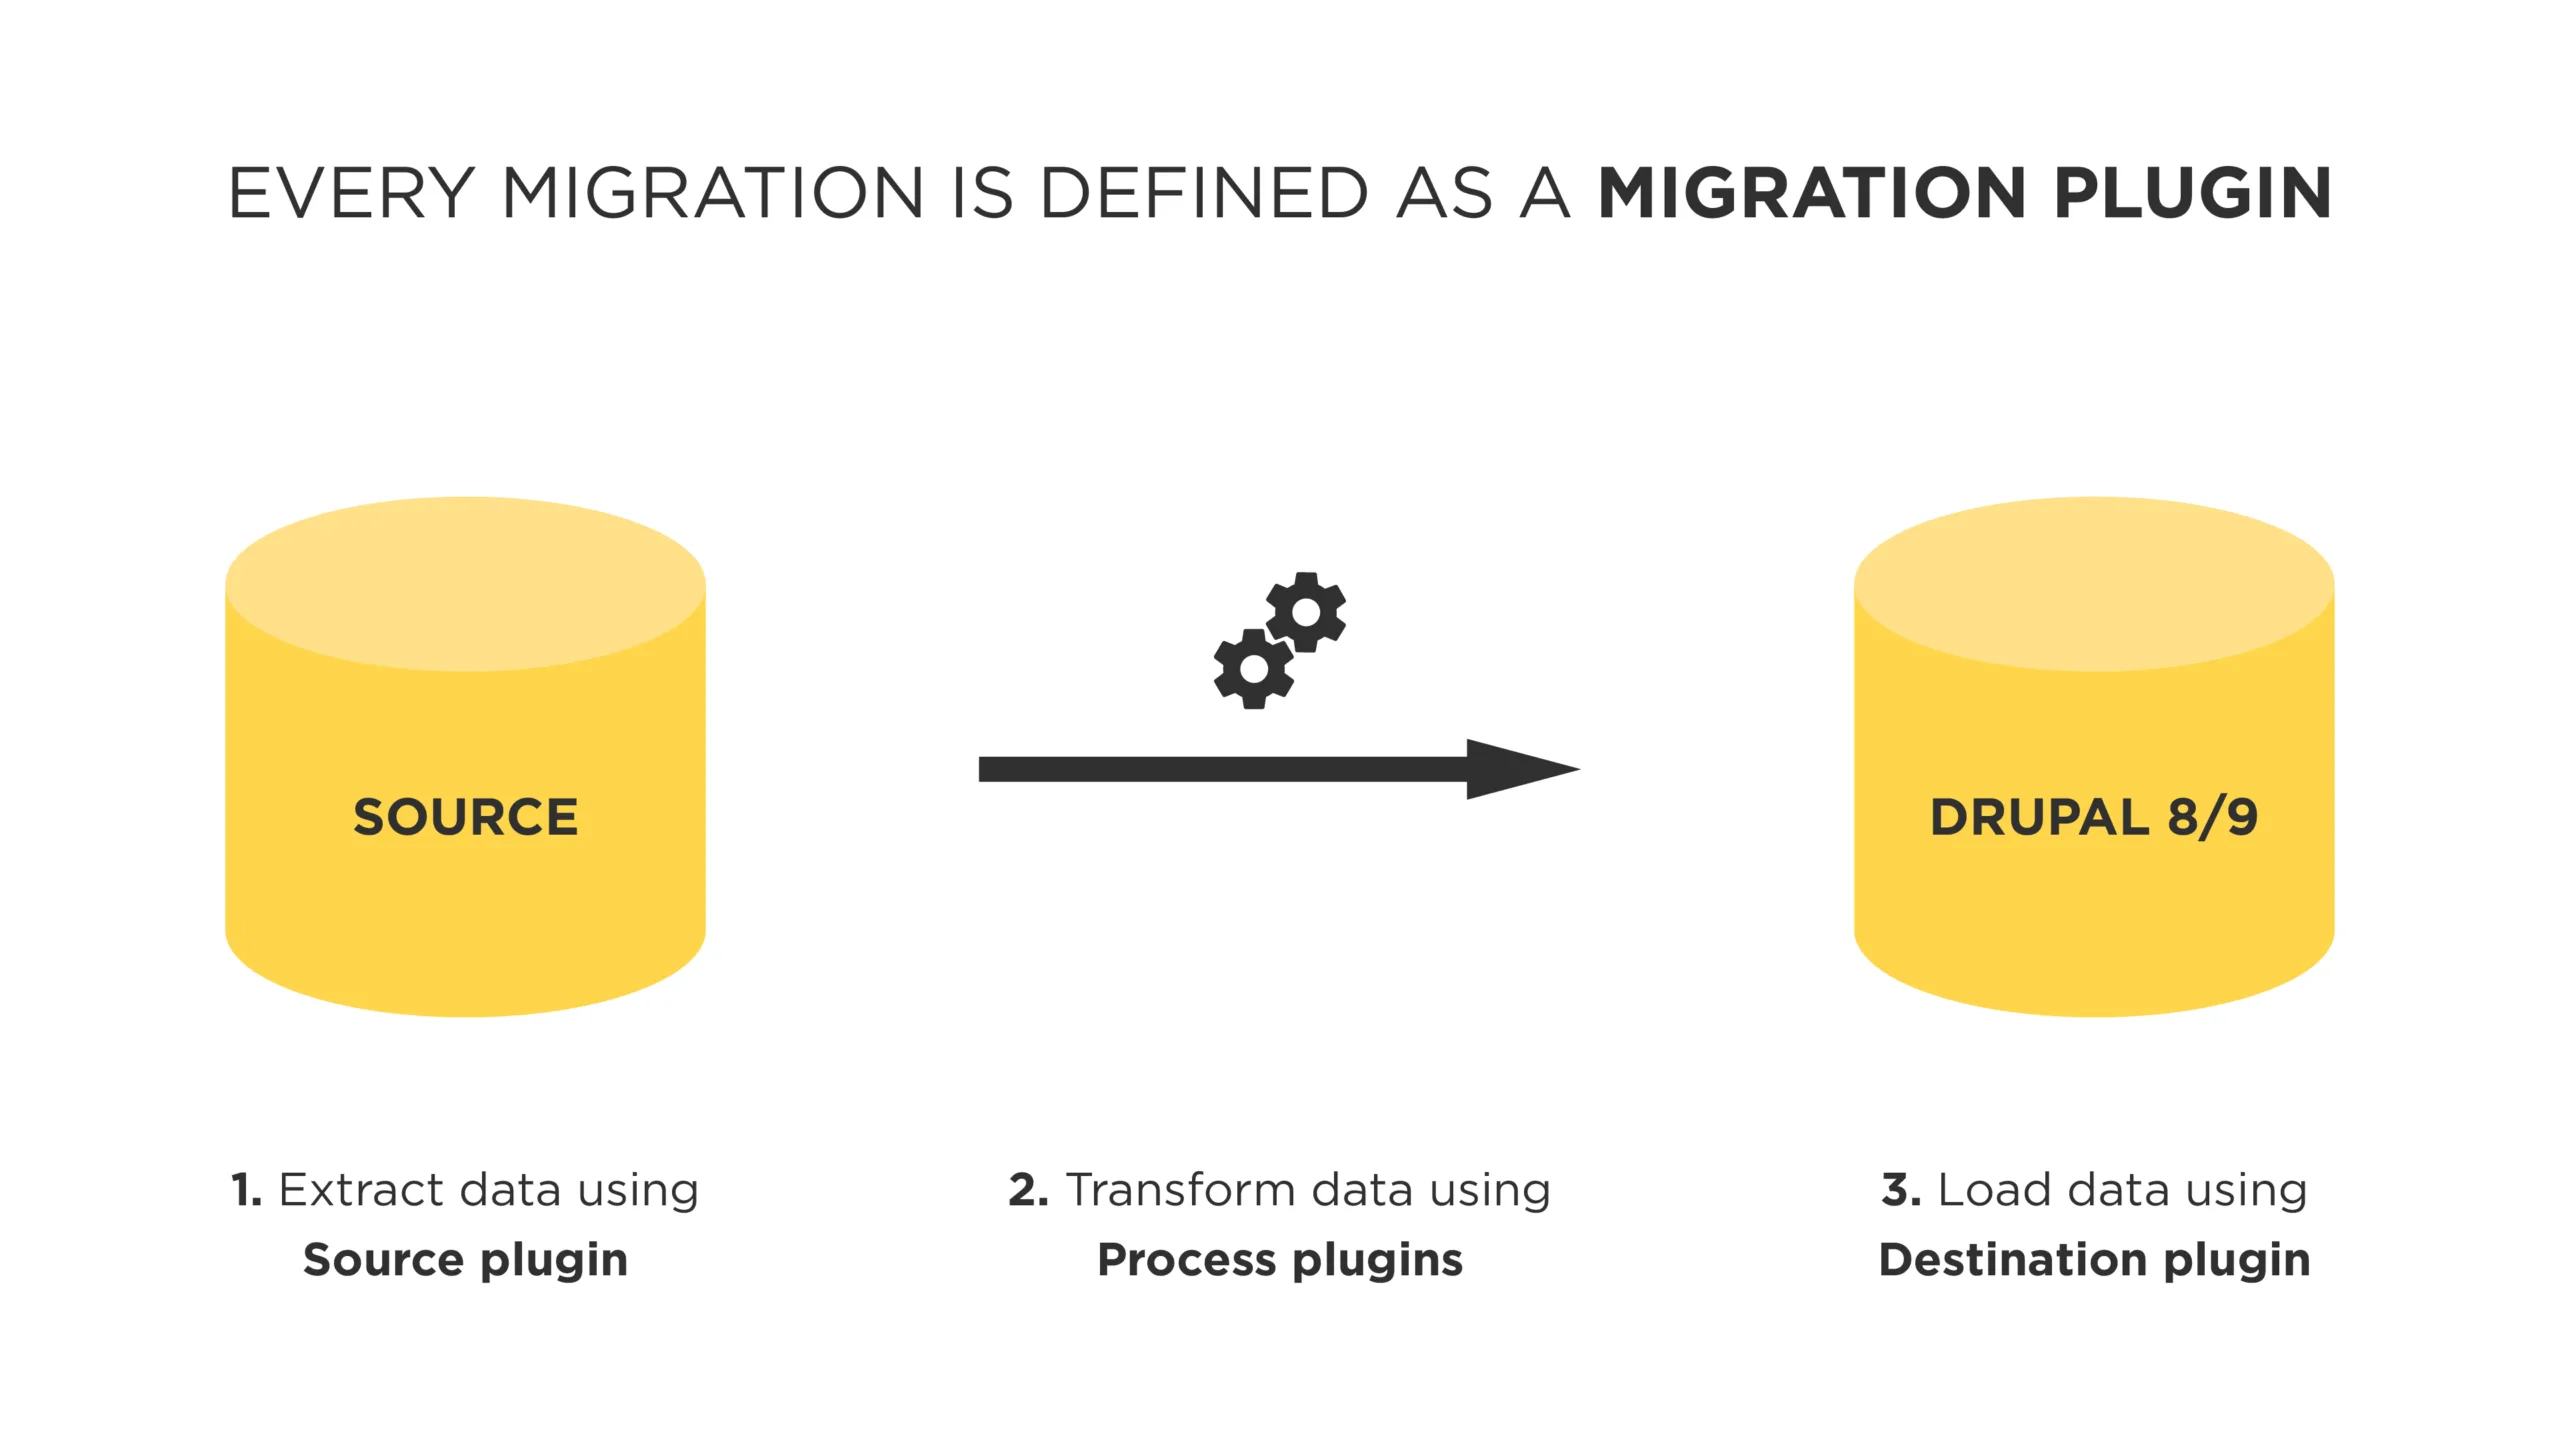
Migrate ETL process.
Possible data sources
Drupal Migrate API is a powerful tool that doesn't restrict you to one or another source of data. In fact, Migrate API allows extracting data from any possible source. These are only several examples:
- Earlier versions of Drupal
- XML documents
- SOAP feeds
- JSON
- CSV
- WordPress and other CMSs
Source plugins are the tools that provide the framework with information about extracting data from different data stores.
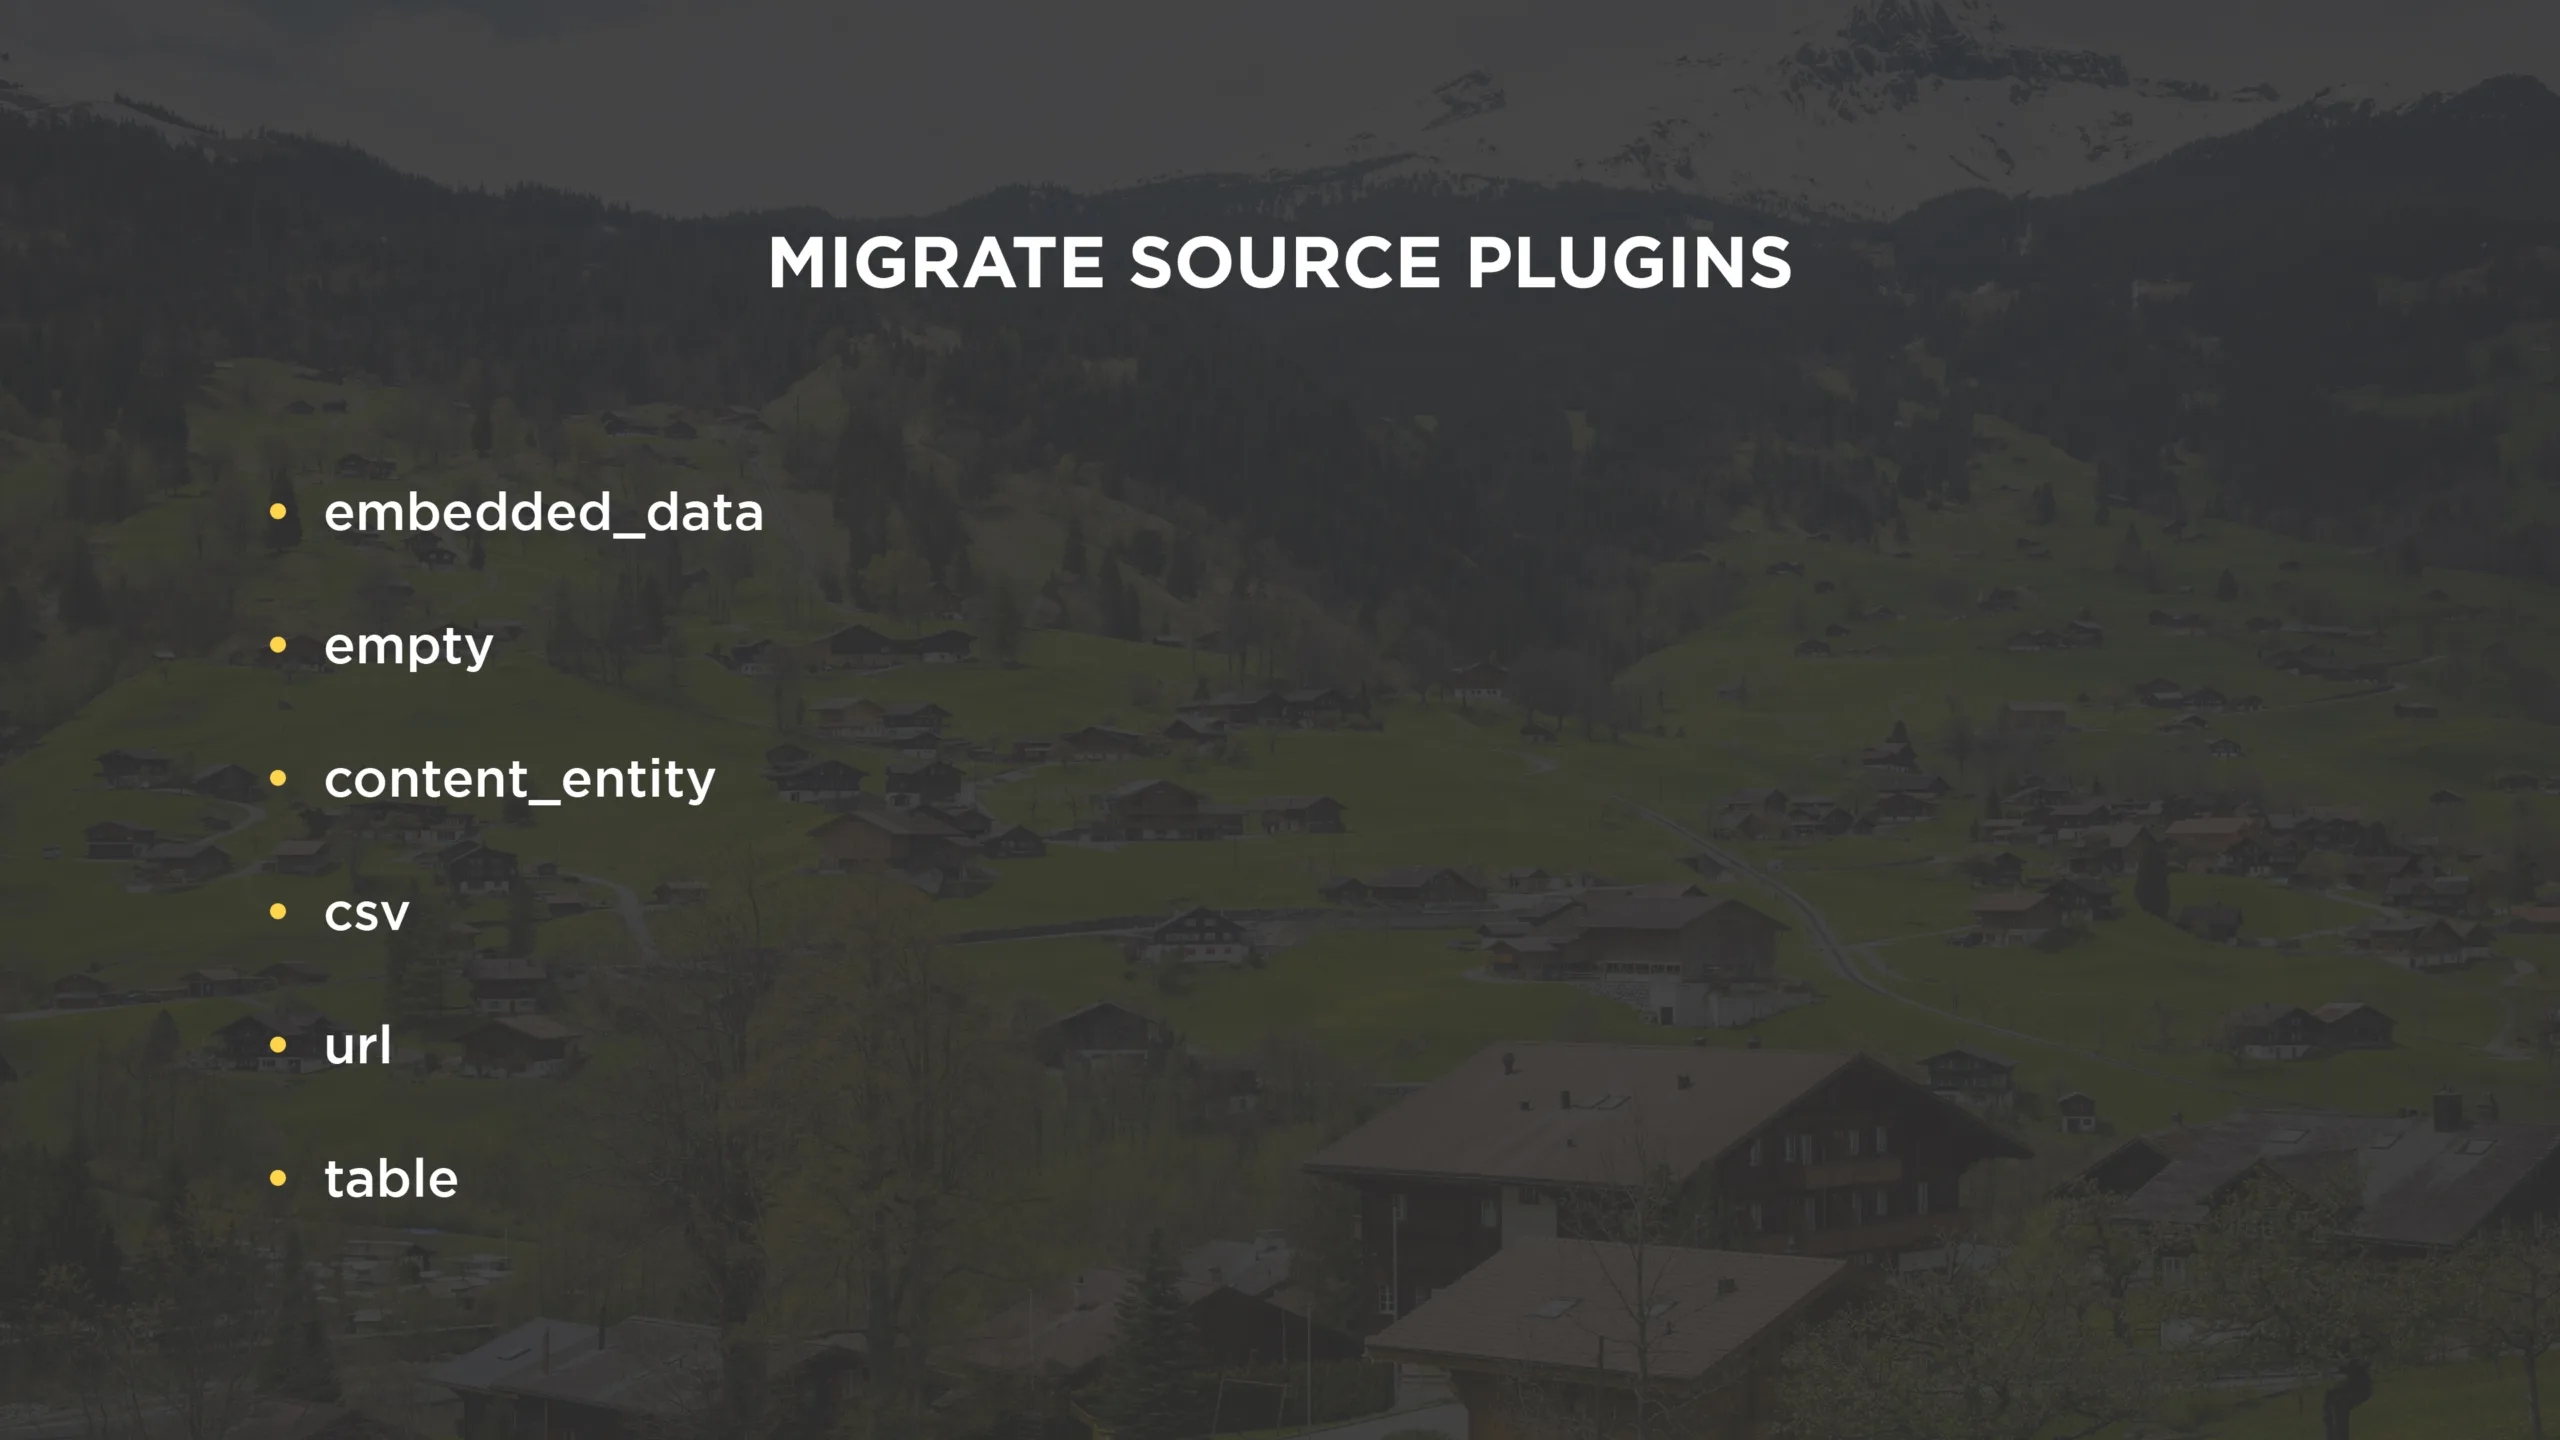
Migrate source plugins
Typical source plugin configuration may look like this:
source:
  plugin: csv
  path: 'private://import/3rd_party_users_data.csv'
  delimiter: ','
  enclosure: '”'
  track_changes: true
  ids: [member_id]
  fields:
    -
      name: member_id
      label: 'Member ID'
    -
      name: first_name
      label: 'Member First Name'
    -
      name: primary
      label: 'Primary Member'
    -
      name: email
      label: 'Member Email'
If you didn’t find a way to import data from your storage, you could write a custom source plugin. To do so:
- Place in
src/Plugin/migrate/source - You can extend
SourcePluginBase,SqlBaseor implementMigrateSourceInterface
Here’s an example:
/**
* @MigrateSource(
*   id = "csv",
*   source_module = "migrate_source_csv"
* )
*/

class CSV extends SourcePluginBase implements ConfigurableInterface {

  public function initializeIterator() {}

  public function getIds() {}

  public function fields() {}

}
Migrate process plugins
Process plugins play a leading role in the migration as it’s thanks to them the source data is converted into the needed format. During the migration, process plugins may parse images from text or import data behind HTTP authentication. These are only two examples, and here’s the list of process plugins:
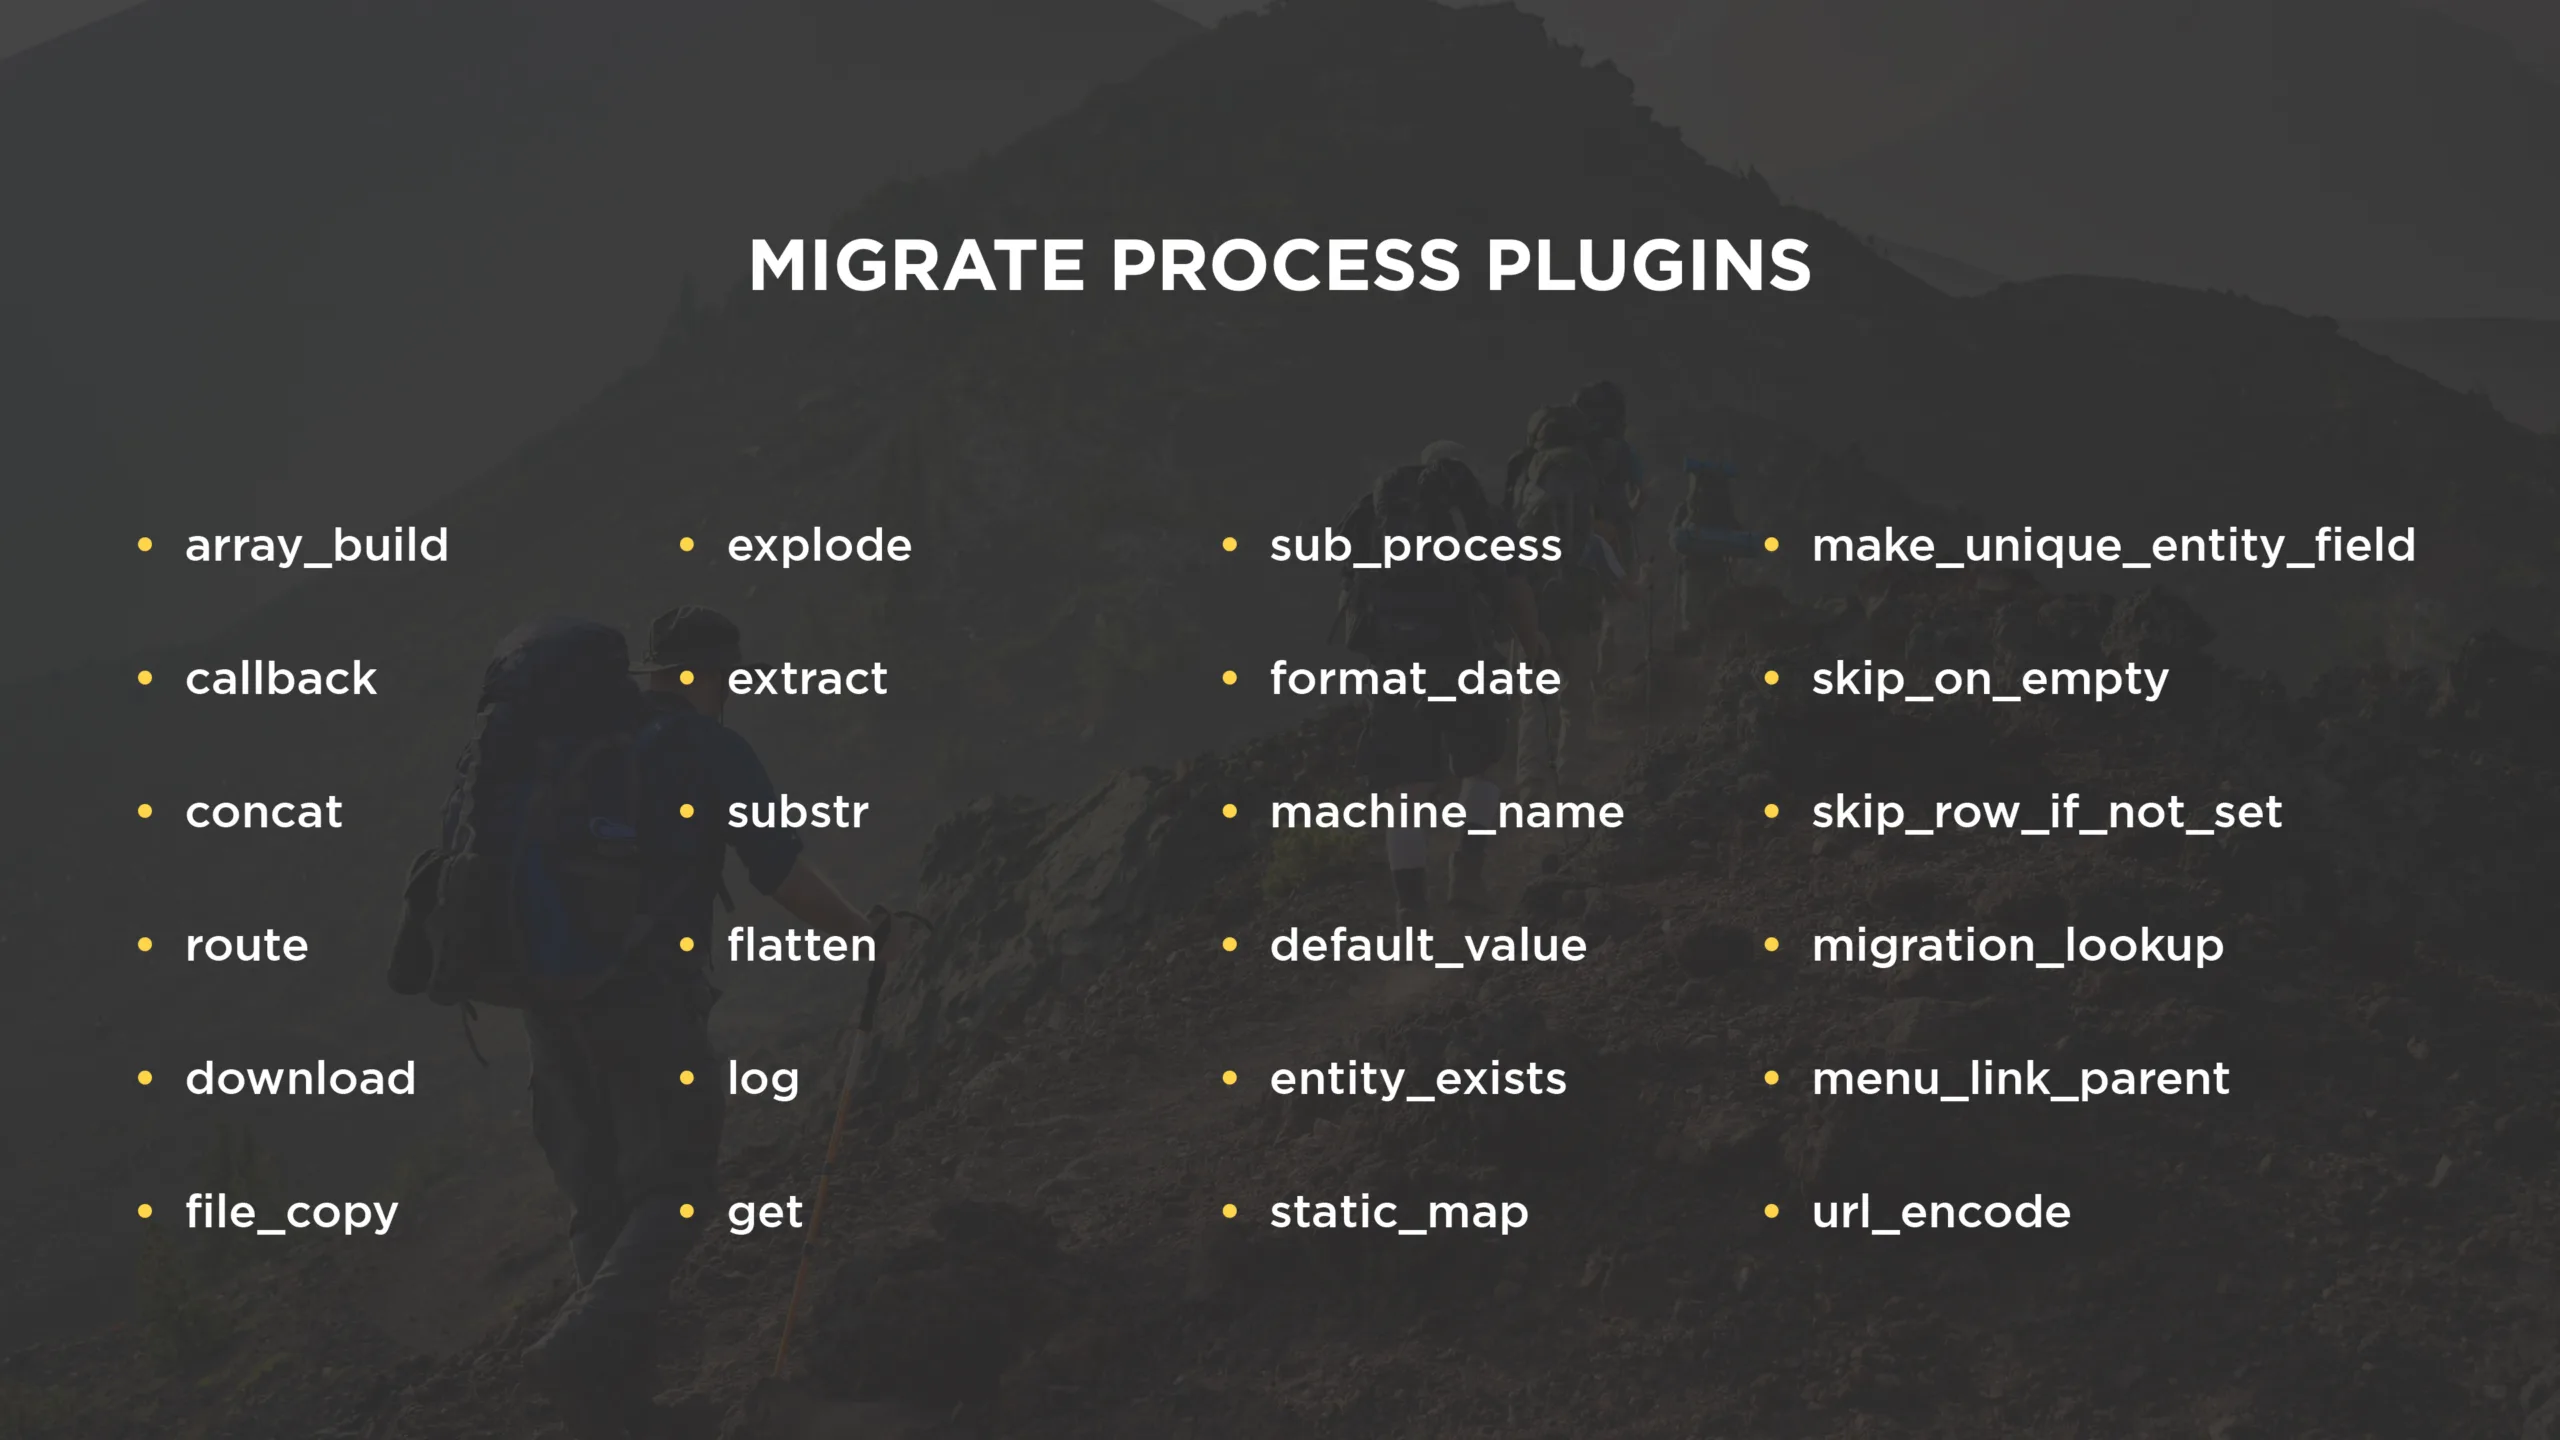
Migrate process plugins
Process plugins support plugins chaining. Where can this feature be used? For instance, we know that the data obtained are capital characters and stored in two columns. To start every word with a capital letter and put them in a text format in one field, we do the following:
process:
  user_name:
    -
      plugin: concat
      source:
        - first_name
        - last_name
      delimiter: ' '
    -
      plugin: callback
      callable: mb_strtolower
    -
      plugin: callback
      callable: ucwords
You can create a custom process plugin. To do so:
- Place in
src/Plugin/migrate/process - You can extend
ProcessPluginBase, some other plugin, or implementMigrateProcessInterface
/**
* @MigrateProcessPlugin(
*   id = "array_build",
*   handle_multiples = TRUE
* )
*/

class ArrayBuild extends ProcessPluginBase {

  public function transform($value, MigrateExecutableInterface $migrate_executable, Row $row, $destination_property) {}

  public function multiple() {}

}
Migrate destination plugins
Destination plugins specify what kinds of Drupal entities are created. The destination entity type is typically defined as entity:entity_type.

Migrate destination plugins
To create a custom destination plugin:
- Place in
src/Plugin/migrate/destination - You can extend
DestinationBase,Entity,Config, or implementMigrateDestinationInterface
/**
* @MigrateDestination(
*   id = "my_custom_user"
* )
*/

class MyCustomUser extends EntityUser {

  public static function getEntityTypeId($plugin_id) {}

  protected function getEntityId(Row $row) {}

  protected function getEntity(Row $row, array $old_destination_id_values) {}

  public function rollback(array $destination_identifier) {}

}
Perform a Drupal Migration
Now that we understand how main plugins work, let’s go through the steps needed to perform a migration.
Write the migration definition.
How and where you’re going to do the migration definition depends on how you’re going to execute the migration. To write the migration definition, you can:
- prepare configuration in YAML format:
- select one source;
- select several process plugins;
- select one destination.
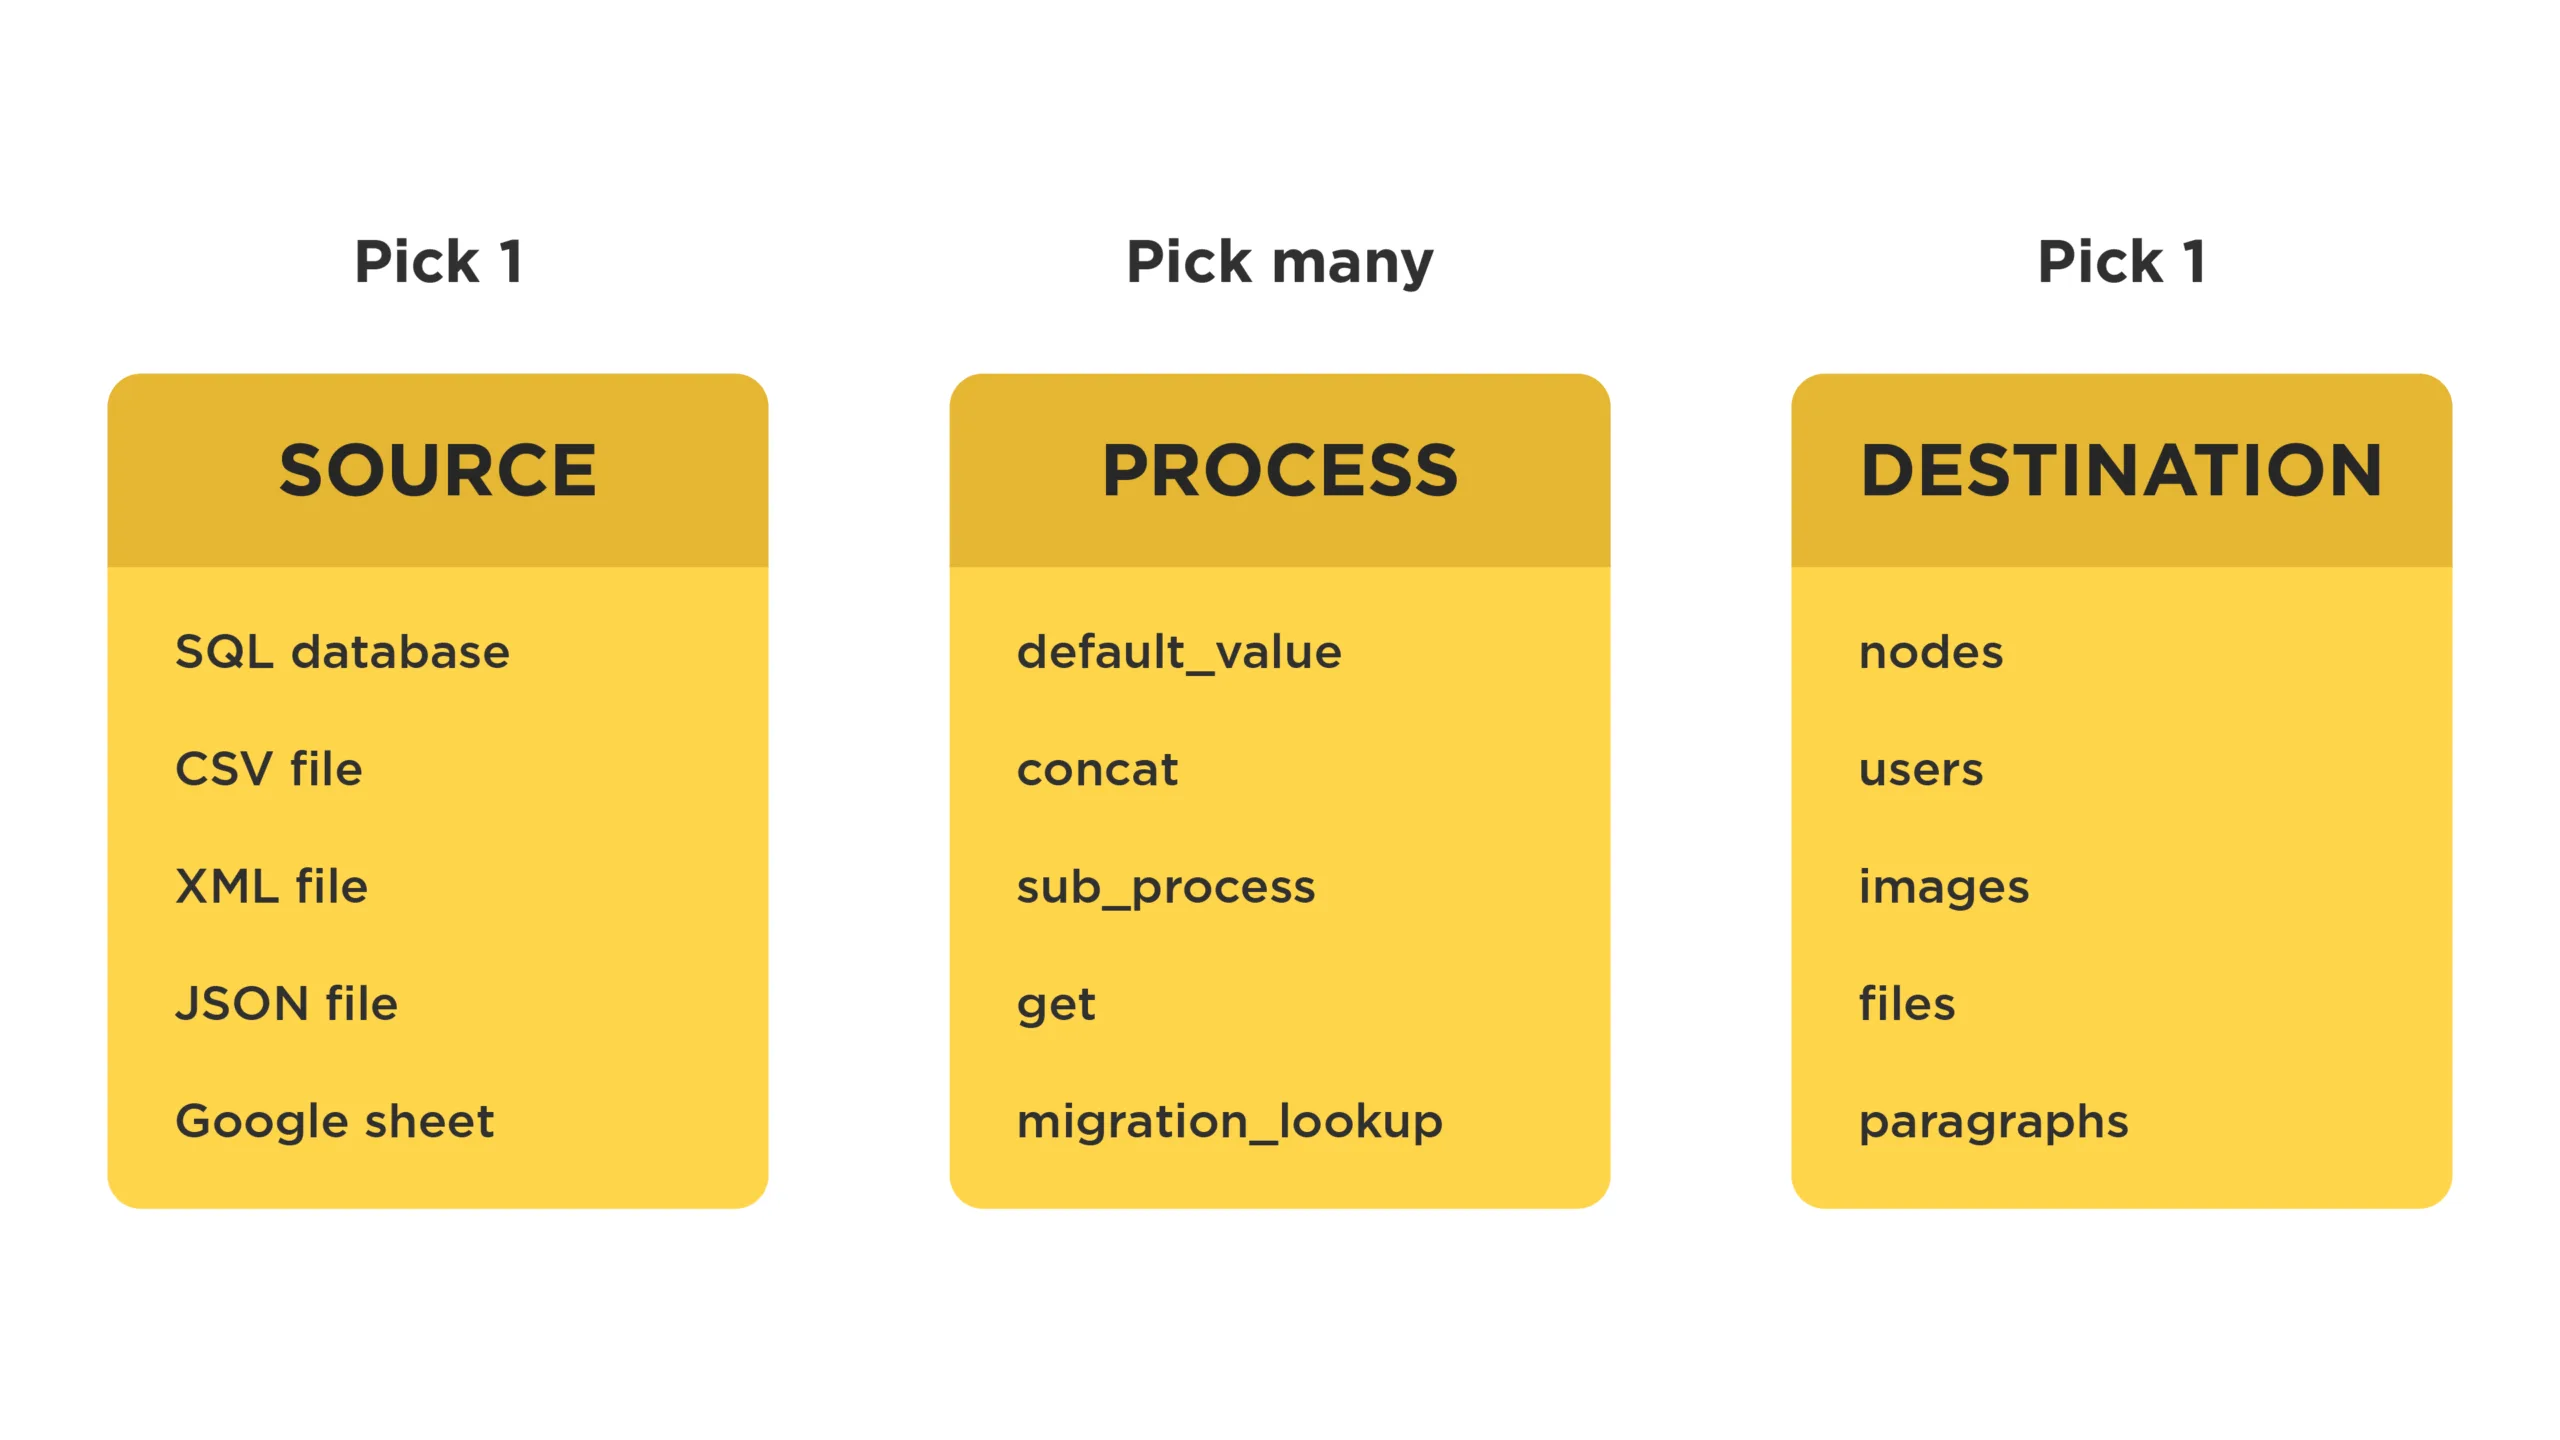
Migration definition file.
- place it in the migrations folder inside of a custom module
- or import migrations’ configs (Migrate Tools).
Here’s an example of the migration definition:
id: create_pages
label: 'Pages create migration'
source:
  plugin: embedded_data
  data_rows:
    -
      unique_id: 1
      creative_title: 'Page 1'
      engaging_content: 'This page will describe some things'
    -
      unique_id: 2
      creative_title: 'Page 2'
      engaging_content: 'This page will describe some other things'
  ids:
    unique_id:
      type: integer
process:
  title: creative_title
  body: engaging_content
destination:
  plugin: 'entity:node'
  default_bundle: page
Execute the migration
There’re a lot of ways to execute the migration, for example:
- using drush commands (drush 10.4 / Migrate Tools)
- using UI (Migrate Tools)
- other options (Migrate Run, Migrate Scheduler, etc.)
Typical Migration Workflow
So, you prepared everything and are ready to execute the migration. Here’s how the workflow may look:
1. Run the migration.
$ drush migrate:import create_pages2. Rollback migration if you did not obtain the expected results.
$ drush migrate:rollback create_pages1. Change the migration definition file.
2. Rebuild caches for changes to be picked up.
$ drush cache:rebuild
5. Run the migration again
$ drush migrate:import create_pagesIf you encountered more complex errors, you can also:
- Stop the migration.
$ drush migrate:stop create_pagesReset the status to idle.
$ drush migrate:reset-status create_pagesRebuild caches for changes to be picked up.
$ drush cache:rebuildSummary
We went through the main features of a very flexible and powerful Drupal Migrate API and saw several examples of migration execution. There may be countless migration scenarios, and this API covers different variations with a wide range of complexity. Every migration process will be highly site-specific. Contact us via email if you want to discuss the Drupal Migrate API or need any help with migration. You also can dive deeper into Drupal by reading our blog.

